Tuesday, 31 December 2013

Makeup Clearout!

Hi!
 
 
Yes I am writing this post as a form of procrastination... I have four essays to write over the next couple of days and I can't be bothered to do any of them. Serves me right for taking English Literature and History as a-levels...
Anyway this is much more fun to write about than the Russian revolution in 1917.
 
So I was looking through my makeup drawers and discovered that there are a whole load of products that I haven't used in ages...some of them too old/dried up/used up and I hadn't even noticed.
 
After doing some research I've found the lifespans for makeup products:
 
Mascara - 3 months
Pencil Eyeliners - 2 years
Eyeshadows - 2 years
Cream Shadows - 1 year
Lipsticks - 2 years
Cream Blush - 1 year
Powder Blush - 2 years
Foundations/Concealers - 2 years
 
 
Now...I'm not going to lie...I do NOT stick to these guidelines and personally I think some of them are myths.
I definitely don't throw away mascaras after 3 months...I throw them out when they've either dried up or I've used them up; I don't see the point in throwing out a perfectly good mascara. Similarly I definitely will not throw out an eyeshadow after 2 years if there is nothing wrong with it.
But its up to you! Personally I throw things out if I've used them up or if they can't be used anymore. Obviously if your lip gloss smells funny or your foundation isn't the same anymore then its probably time for a clear out. :)
 
 
I realised that there were some old, unusable products cluttering up my drawers and I thought that if I'm not using them anymore there is no point in keeping them.
 
 
Wow. That's a lot of makeup :P
I also threw out a couple of old, dried up nail polishes too so I've cleared up a lot of space in my makeup drawers.
 
1) Lips
 
 
This is the drawer that I think needed a clearout the most. There were several lipglosses that were old and some that were leaking (one of my biggest dislikes with lip products) and I just didn't want or need them anymore.
 
I threw out:
  •  A L'Oreal gloss that I didn't ever even like... the smell was too strong and it was too frosty for me
  •  A Natural Collection gloss that started to smell different and I hadn't used in months
  • A Max Factor gloss I got for free a while ago. I LOVED this colour but now its old and I've used up most of it anyway.
  • An Urban Decay mini lipgloss that came free with a set that I didn't like the colour of to start with.
  • An old Lipmate lip balm that was really old
  • My mini Benefit Lip Plump. I used this to mute out my lip colour before lipstick but I've used up most of it and even so I can use concealer for this purpose.
2) Palettes
 
 
These came from my "small palettes" drawer.
I got rid of:
 
  • My Benefit The Realness Of Conealness palette. I've taken out all the mini products that came in this box and I've still got them. However there were 2 products in a pan in this box; one was the Lemon Aid which I've pretty much used up. The other was the Boi-ing which I dislike and anyway, its in the wrong shade. I felt it was time to get rid of this clunky packaging in my drawer!
  • Urban Decay lip palette. This is really too old for me to justify keeping. I didn't even use the lip colours in there anymore anyway because they were old. I liked to keep a hold of it because its pretty packaging but its silly to let it take up space when I don't use it. 
3) Eyeshadows
 
 
I honestly don't know why I haven't thrown these out before now. Two of them were given to me by my sister ages ago and the other one was a shadow I never even liked.
Two of them are by Virgin Vie and the other by Barbara Daly and it had such awful pigmentation I swatched it and then it was shoved to the back of the drawer and forgotten about.
I also almost threw out a Body Shop eyeshadow that looks like a bruise. Before I remembered that I actually use it to look like bruises sometimes when I'm taking photos for my art projects (yes they tend to be quite dark...) so I decided to hang on to it :)
 
4) Eye...stuff?
 
 
I don't know what category these come under.  :P
One is the a Beauty Parlour eye roll on that never really did anything but was hanging around in my makeup drawers for a long time.
The other is the Bourjois Brush Concealer that I've actually used up now! It was very useful and I've finished every little bit of it now which makes me feel satisfied :) You can read a full review HERE.
 
5) Eye Liners
 
 
There wasn't a lot to throw out my my eyeliner drawer...apart from:
 
  • My old Body Shop eyeliner. Again, this was given to me by my sister a long time ago and to be honest its too dry to use properly. I thought it was time to give up on this one.
  • I also got rid of my Barry M glitter eyeliner. This stuff never worked even when I got it and has been drying out more and more ever since.
6) Mascaras
 
 
These were definitely ready to be thrown away...
 
  • I have two of the Maybelline Great Lash and seeing as I don't particularly like either I thought it seemed right to throw out one (the older one) and keep the newer one just as a backup mascara in case I'm ever caught without any.
  • My E.L.F Volumizing Mascara has now pretty much completely dried up and does nothing for my lashes now. You can read a review of it HERE if you want. It pretty much came dried up.
  • Ah my Stila Fibre Optics Mascara. I thought I'd done a review of this but it turns out I never got round to it. For a while this was my favourite mascara! It's really volumizing and made my lashes thick and full without clumping up or sticking them together. I was a big fan of this and sad to see it go, however now I've pretty much used it all up.  
 
Wow that was quite a long post... :P
It was actually surprisingly fun to go through my makeup drawers and get rid of products that were taking up unnecessary space. I also discovered some products that I'd forgotten about in my drawers - ones that I'll definitely be getting use out of in the next few days and weeks.
 
And... I personally think the best thing about it is that now I'm able to go and find more pretty makeup items to fill those drawers - products that I'll actually use!
 
Have you had a makeup clear out recently?
Thanks for reading!
Libby x

Monday, 30 December 2013

Post Christmas Haul!

Hi!
 
I hope you had a good Christmas if you celebrate it and if not, hope you all had a good holiday season! :)
Our 6 month old collie had a particularly lovely day...
 
Anyway, I went on a little shopping trip the other day and picked up some hair/nail/skincare things in the sales!
 
I picked up John Frieda Full Repair Hydrate & Restore Shampoo & Conditioner first of all....
I usually only get these when they're on offer as £6/7 is quite a bit to pay for shampoo when it doesn't last that long...particularly with me as I have long hair! There was a 3 for 2 offer on "premium haircare" in Boots so I also got the John Frieda Luxurious Volume Dry Shampoo too as I was intrigued by their "luxurious volume" range as my hair is quite flat sometimes. I decided to try just the dry shampoo though as I've only ever really tried a couple of different dry shampoos and wanted to see how a more expensive one was different.
 
I also picked up some double faced cotton pads from Boots too as I was running out... I love these as they have a soft side for toner for your skin and then the rougher side is great for removing nail polish. These are only about £2 if I remember correctly.


I also then went to Superdrug (I know it is a bit weird to go to both  but they have slightly different brands, honest!) and I was drawn to the Barry M Glitter Nail Polishes in 353 Ruby Glitter and 335 Copper. They didn't have such a big range of Barry M Polishes in Boots so I generally like to have a look in Superdrug to see if there are any others there. Definitely looking forward to putting these on my nails soon! They were £2.99 each.
 
I also looked at some Simple skincare products in Superdrug and got the Kind To Skin Moisture Boost Hydro Mist which was £2 off. I really love this stuff and its my third bottle. I used to use it a LOT a year or so ago but when it ran out I forgot to repurchase. However now I'm glad I did rebuy it as I love this stuff. I spritz it on my face after foundation and it gives a lovely glow and keeps my skin feeling hydrated all day. This was about £4 with the £2 off.
 
I also got the Simple Kind To Skin + Perefecting Beauty Balm as I was intrigued by it. I think this was around £7 and I was surprised to see they only had one "universal shade" which was curious.
I'll be doing a review on this soon although on first glance it does look a little orange... perhaps not as "universal" as they thought.
 
 A few days ago I also picked up some new face wash, toner and a new mascara which I'll also be reviewing soon so keep an eye out for that even though I don't have pictures included in this post.
 
Have a good day!
Thanks for reading :)
Libby x
 

Saturday, 14 December 2013

*REVIEW* NYX Blush in Natural

Hi!

Quite a while ago I made a purchase from the NYX website (www.nyxcosmetics.co.uk/) and I only just realised that I never actually reviewed this item! If you'd like to see that haul you can view it HERE and as far as I can tell I think I've done reviews for all the other items I purchased. :)
 
This costs £6 from the website and they have 25 shades!
 I chose the shade Natural because having blonde hair, blue eyes and fair skin its harder for me to get away with strong blush colours and so I generally tend to stick to a rather muted blush look if at all.


The shade is a light baby pink with a slight bit of shimmer in it - it's looking a lot brighter in the photo than in real life!
The packaging is also nice and sturdy and the shape makes it easy when it comes to saving space in your makeup collection. :)


Here's a swatch:
 
 
Obviously I wouldn't apply the blush this heavily! :P
 
Generally I think this is a really pretty colour especially for those with fair skin.
As you can see its very well pigmented but not so pigmented that it makes it difficult to wear...I personally don't like hyper-pigmented blushes as I'd never wear colour on my cheeks that strongly!
 
I usually just tap my brush into this and then tap off the excess and apply it. The colour this way is very buildable and it's hard to over apply.
 
I'm really happy with this blush -especially for the price! I've been reaching for it quite often recently and it gives a lovely flushed appearance to the cheeks.
 
Thanks for reading!
Have you tried the NYX blushes yet?
Libby x
 

Sunday, 1 December 2013

How To Get Studded Nails!

Hi!
 
I'm by no means the best at nail art...a combination of me being clumsy and also impatient usually renders my nails smudged and messy.
 
However you can still try, right? :)


I spotted these 17 Deconstructed Nail Studs on sale in Boots and from the moment I saw them I knew I couldn't leave without them!
I love the packaging too!


These studs are pretty tiny to be careful not to knock the little pot over!


1)
First I applied a clear base coat to my nails to stop them staining.
 
2)
I put on one coat of a dark charcoal colour with slight shimmer. You could either use grey or black which would both look great with these studs so its up to you! The colour I used as from the Nail Parade collection from The Colour Workshop that I got ages ago.
 
 
3)
 
When you put on the second coat of polish, apply the nail studs whilst the polish is still wet. I've found the best way to do this is to press them into your finger and then lightly dab the nail to apply them. If they need moving slightly or pressing in further then you can use tweezers or a cuticle stick.


4)

Finally, add a clear coloured coat of nail polish over the top to seal the studs and help them last longer on your nails!
 
I'm SUPER happy with the finished result...it looks so edgy and cool and I absolutely love it. I will definitely be using these all the time in the future!
 
The nails studs from 17 are about £4 and in my opinion worth every penny - they did a great job with these!
 
What do you think of studded nails? Let me know in the comments below!
 
Thanks for reading!
Libby x

Monday, 11 November 2013

*REVIEW* Sleek Vintage Romance Palette

Hi!
 
It's no secret that I adore the Sleek eyeshadow palettes...I actually have 7 of them and I have no intention of stopping there! :)
 
 
I love the packaging that these palettes come in - they're very sturdy and (as their brand name would suggest) sleek. They also stack very easily and take up minimal space.
 
These costs £7.99 and I was recently thrilled (possibly a little more thrilled than is rational) that there is now Sleek in Boots stores as well as Superdrug! :D:D:D
 
 
There are 12 shades in this palette: 6 metallic shades, 2 shimmer, 3 sparkle shades and 1 matte.
 
I have to say straight away that I love the mix of shadows in this palette in terms of shades. I love these deep, sultry shadows that can create a smokey look but because of the pinks/purples they still look glamorous and have some colour.
 
The texture of the metallic is (as usual with Sleek) great; they're buttery, smooth and pigmented. A few other shades are a little dry and need perhaps a touch more work to get them looking true to pan but there isn't a dud shade in here. I can honestly say there is no shade here that doesn't work well for me.
 
I'll break up the shades into groups of four as it makes them a little easier to photograph and swatch!


These are the first four shades.
 
From top:
 
Pretty In Paris:
 Metallic, frosty pale silver colour.
This has good pigmentation and whilst it is too much for me to use as a brow highlight it works really well on the inner corner.
 
Meet in Madrid:
Metallic yellow/orange gold.
 I'm SUCH a sucker for gold colours. Again, great pigmentation. This reminds me of UD's Half Baked apart from it has more orange undertones. I love using golds and this has been used quite a few times already.
 
A Vow In Venice:
Shimmery deep plum colour. I'd say this is a shimmer as opposed to metallic because it isn't as intense, yet it is still pretty and works well for a plum smoky eye. The pigmentation isn't perhaps as amazing as the first two but is still very good.
 
Marry In Monte Carlo:
Dark, frosted burgundy/dark fuscia. This (along with the other frosted shades) has pretty stunning pigmentation. This looks so pretty packed on the lid!
 
Here are the second group of 4!


From top:
 
Court in Cannes:
Medium metallic brown/taupe.
I love these types of shades as theyre great for a traditional simple neutral look. This again has great pigmentation and looks so pretty on the middle of the lid.
 
 
Lust In LA:
This is more cool toned that Court In Cannes but with the same metallic/frosty finish and same great pigmentation. I sometimes can see very subtle hints of olive in this shade but that could be my imagination playing tricks on me.
 
 
Honeymoon In Hollywood:
This is a rich berry shade with some silver sparkle. I was impressed because despite the slightly drier finish I found that the pigmentation was great.
 
Bliss In Barcelona:
Frosty, metallic medium purple. This seems to show up with almost a blueish reflex sometimes and reminds me of UD's Psychedelic Sister and also a little bit of Blue Bus but this has a far less obvious blue base. In the pan this looks a lot more purple than in the swatch above.
 
Here are the last 4 shades!


I took the photos for these swatches sideways as it seemed to work a little better this way.
 
From top/right
 
Romance In Rome:
This does remind me of the last shade but although this looks dark in the pan this is a lot more blue. It looks like a dark purple but this does have a similar blue reflex to the previous shade but it is more prominent.
 
Propose In Prague:
This is the only matte shade in this palette and it is an uncommon shade. It's a warm, orange toned mid brown shade and is quite interesting. I think this shade is useful for blending purposes even if I don't use it on it's own that much. The pigmentation is decent but it can be a little on the chalky side.
 
Forever In Florence:
This is a deep plum/burgundy which has some sparkle in it. The texture is again a little dry but the pigmentation is good. This looks quite a bit brighter and lighter than it is in the pan.
 
Love In London:
This is one of my favourites: it is a matte black but with a lovely sparkle to it. The pigmentation is really good and this is such a useful shade for adding into the crease to darken.
 
 
So there are all the shades! I have to say that I'm really happy with this palette and I'm sure I'll use this palette a lot. You can create quite a variety of looks ranging from golden/taupe looks to deep plums. Something that is interesting is that quite a few of the colours look quite different when swatched compared to how they look in the pan, but all the colours are beautiful.
 
As mentioned earlier, there isn't a bad shade in this palette!
 
Have you tried this palette yet?
Thanks so much for reading!
Libby x

Saturday, 2 November 2013

Bourjois Paris 1001 Lashes Mascara

Hi!
 
My review to day is of the Bourjois Paris mascara that I showed recently in a haul.
As far as I can tell from looking online, this retails for about £3 although I don't think I've seen it really in many stores.
 
 
This has a rubber wand which I really like as I prefer them to bristle brushes...I find that they separate my lashes more.
 
 
I did try to take before and after photos for this but I struggled with the lighting...the photos don't look very clear so I thought I'd leave them out!
 
Basically although this does volumise my lashes quite well it does clump easily. The formula is pretty wet and quite sticky which I don't like too much as I prefer drier formulas.
The wand definitely helps with stopping it clumping  ( I don't want to think about how much clumping there would be if the want wasn't so good) but I still find my lashes are quite hard and stiff after applying this.
 
Another thing I've noticed is that the wand feels a little...scratchy? It's hard to describe but when putting it on my lashes the wand is quite spiky and its not too hard to accidently poke yourself in the eye...and it hurts.
Maybe I'm just clumsy! :P
 
I think overall it's a decent mascara and I'll probably use it till it either dries up, or I get bored and find something else I prefer!
 
Thanks for reading!
Libby x


Thursday, 10 October 2013

Sleek Series: 5 Looks With The Sleek Acid Palette

Hi!
 
I was looking through my Sleek palettes the other day and decided that I needed to remember to get more use out of them!
I thought I'd do a little series of posts where I do 5 different looks with each of the palettes.
I shuffled them and the first one I picked up was coincidentally the newest addition to my Sleek eye shadow palettes, the Acid palette. This is such a fun palette to experiment with!


Here are the 3 looks!
 
 
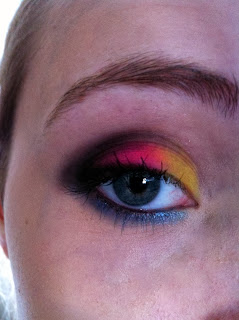
Look 1:


This is probably my favourite...I love the mix of bright colours and the black to add smokiness in the outer corner.
 
Colours used:
 
Matte Black (crease)
Neon Pink (Middle third)
Neon yellow (Inner third)
Shimmery Lighter Blue (inner half of bottom lashline)
Matte White (highlight)
Shimmer Darker Blue  (outer half of bottom Lashline)
 
I then finished with black eyeliner and mascara.
 
Look 2:


I decided to go for more blues/greens in this look.
 
Colours used:
 
Neon Green (inner third)
Shimmery Silver (outer third)
Shimmery dark blue (crease)
Matte White (highlight)
 
Again, black liner and mascara were then added!
 
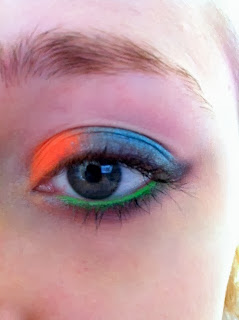
Look 3:


This was quite a bright look that isn't too wearble but fun to try out :)
 
Colours Used:
 
Neon Orange (Inner third)
Shimmery Blue (Crease)
Neon Green (waterline over NYX eyeshadow base)
Matte Black (lower lashline)
 
I then added mascara.
 
Look 4:


This look is very...pink. :)
 
Colours Used:
 
Neon Pink (inner half)
Deeper Pink (outer half)
Black (crease)
Matte White (highlight)
+ Black liner.
 
This is really bright which is so easy to do when you have a palette that is as bold and bright as this is! :)
 
Look 5:


 This look to me just screams "acid". This bright green actually looks really cool and I actually really like this look!
 
Colours Used:
 
Neon Green (Inner half)
Moss Green (Outer half)
Black (Crease)
Neon Yellow (Inner corner near tearduct)
White (highlight)
Neon Green (used over NYX eyeshadow base on the waterline)
Shimmery blue (smudged on bottom + top lashines)
 
Bonus:
 
I decided to include this as a "bonus" as its very close to the first look...however I substituted the black for the matte dark pink and discovered that you can actually make it look surprisingly different...this is pretty much the same as the first look but even brighter.


Colours used:
 
Matte Dark Pink (crease)
Neon Pink (middle third)
Neon Orange (blending middle third and inner third)
Neon Yellow (Inner third)
Shimmery Light Blue (bottom lashline)
Matte Black (Top lashline)
 
 
So there you go!
These types of posts do take a little while to put together but they're very fun to do and it means that I can get the most out of the shadows that I have..
Eventaully I will get one of these posts done for each of the 6 palettes that I have from Sleek so keep a look out if you're interested! :)
 
Thanks so much for reading!
Libby x