Showing posts with label Help/Advice. Show all posts

Tuesday, 31 December 2013

Makeup Clearout!

Hi!
 
 
Yes I am writing this post as a form of procrastination... I have four essays to write over the next couple of days and I can't be bothered to do any of them. Serves me right for taking English Literature and History as a-levels...
Anyway this is much more fun to write about than the Russian revolution in 1917.
 
So I was looking through my makeup drawers and discovered that there are a whole load of products that I haven't used in ages...some of them too old/dried up/used up and I hadn't even noticed.
 
After doing some research I've found the lifespans for makeup products:
 
Mascara - 3 months
Pencil Eyeliners - 2 years
Eyeshadows - 2 years
Cream Shadows - 1 year
Lipsticks - 2 years
Cream Blush - 1 year
Powder Blush - 2 years
Foundations/Concealers - 2 years
 
 
Now...I'm not going to lie...I do NOT stick to these guidelines and personally I think some of them are myths.
I definitely don't throw away mascaras after 3 months...I throw them out when they've either dried up or I've used them up; I don't see the point in throwing out a perfectly good mascara. Similarly I definitely will not throw out an eyeshadow after 2 years if there is nothing wrong with it.
But its up to you! Personally I throw things out if I've used them up or if they can't be used anymore. Obviously if your lip gloss smells funny or your foundation isn't the same anymore then its probably time for a clear out. :)
 
 
I realised that there were some old, unusable products cluttering up my drawers and I thought that if I'm not using them anymore there is no point in keeping them.
 
 
Wow. That's a lot of makeup :P
I also threw out a couple of old, dried up nail polishes too so I've cleared up a lot of space in my makeup drawers.
 
1) Lips
 
 
This is the drawer that I think needed a clearout the most. There were several lipglosses that were old and some that were leaking (one of my biggest dislikes with lip products) and I just didn't want or need them anymore.
 
I threw out:
  •  A L'Oreal gloss that I didn't ever even like... the smell was too strong and it was too frosty for me
  •  A Natural Collection gloss that started to smell different and I hadn't used in months
  • A Max Factor gloss I got for free a while ago. I LOVED this colour but now its old and I've used up most of it anyway.
  • An Urban Decay mini lipgloss that came free with a set that I didn't like the colour of to start with.
  • An old Lipmate lip balm that was really old
  • My mini Benefit Lip Plump. I used this to mute out my lip colour before lipstick but I've used up most of it and even so I can use concealer for this purpose.
2) Palettes
 
 
These came from my "small palettes" drawer.
I got rid of:
 
  • My Benefit The Realness Of Conealness palette. I've taken out all the mini products that came in this box and I've still got them. However there were 2 products in a pan in this box; one was the Lemon Aid which I've pretty much used up. The other was the Boi-ing which I dislike and anyway, its in the wrong shade. I felt it was time to get rid of this clunky packaging in my drawer!
  • Urban Decay lip palette. This is really too old for me to justify keeping. I didn't even use the lip colours in there anymore anyway because they were old. I liked to keep a hold of it because its pretty packaging but its silly to let it take up space when I don't use it. 
3) Eyeshadows
 
 
I honestly don't know why I haven't thrown these out before now. Two of them were given to me by my sister ages ago and the other one was a shadow I never even liked.
Two of them are by Virgin Vie and the other by Barbara Daly and it had such awful pigmentation I swatched it and then it was shoved to the back of the drawer and forgotten about.
I also almost threw out a Body Shop eyeshadow that looks like a bruise. Before I remembered that I actually use it to look like bruises sometimes when I'm taking photos for my art projects (yes they tend to be quite dark...) so I decided to hang on to it :)
 
4) Eye...stuff?
 
 
I don't know what category these come under.  :P
One is the a Beauty Parlour eye roll on that never really did anything but was hanging around in my makeup drawers for a long time.
The other is the Bourjois Brush Concealer that I've actually used up now! It was very useful and I've finished every little bit of it now which makes me feel satisfied :) You can read a full review HERE.
 
5) Eye Liners
 
 
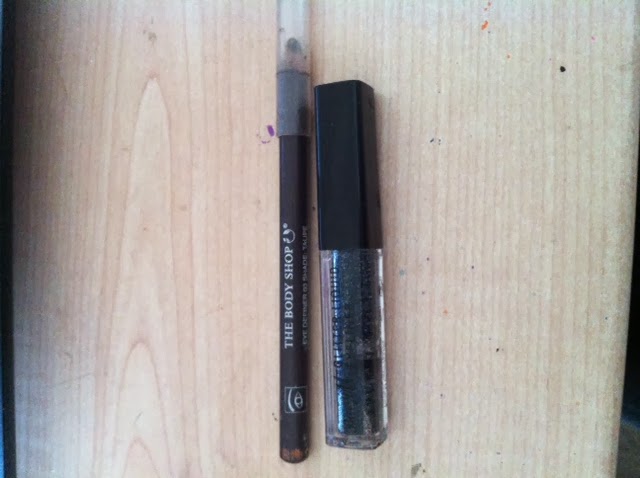
There wasn't a lot to throw out my my eyeliner drawer...apart from:
 
  • My old Body Shop eyeliner. Again, this was given to me by my sister a long time ago and to be honest its too dry to use properly. I thought it was time to give up on this one.
  • I also got rid of my Barry M glitter eyeliner. This stuff never worked even when I got it and has been drying out more and more ever since.
6) Mascaras
 
 
These were definitely ready to be thrown away...
 
  • I have two of the Maybelline Great Lash and seeing as I don't particularly like either I thought it seemed right to throw out one (the older one) and keep the newer one just as a backup mascara in case I'm ever caught without any.
  • My E.L.F Volumizing Mascara has now pretty much completely dried up and does nothing for my lashes now. You can read a review of it HERE if you want. It pretty much came dried up.
  • Ah my Stila Fibre Optics Mascara. I thought I'd done a review of this but it turns out I never got round to it. For a while this was my favourite mascara! It's really volumizing and made my lashes thick and full without clumping up or sticking them together. I was a big fan of this and sad to see it go, however now I've pretty much used it all up.  
 
Wow that was quite a long post... :P
It was actually surprisingly fun to go through my makeup drawers and get rid of products that were taking up unnecessary space. I also discovered some products that I'd forgotten about in my drawers - ones that I'll definitely be getting use out of in the next few days and weeks.
 
And... I personally think the best thing about it is that now I'm able to go and find more pretty makeup items to fill those drawers - products that I'll actually use!
 
Have you had a makeup clear out recently?
Thanks for reading!
Libby x

Sunday, 28 July 2013

5 Different Looks With The UD Naked Palette!

Hi!
 
When the Naked palette came out from Urban Decay, I told myself I wasn't going to buy it. I told myself it was too expensive just for eye shadows. I did manage to hold off buying it for a long time until I found myself reading reviews and seeing swatches and...well...I caved.
 
And I'm very glad I did!
 
Now I have my palette (along with a large percentage of the population) I decided that I had to promise to myself to get good use out of it, something that I feel I have achieved!
Although I am aware that it can be a little tricky working out really different looks that can be created using this, so I thought I'd compile a little list of 5 different looks to hopefully inspire some people!


Look how pretty! :)
 
Here's a really quick run down of the colours for reference:
 
Virgin: Soft, satin finished cream
Sin: Shimmery champagne
Naked: Matte light/mid brown
Sidecar: Cool toned light brown with shimmer & some small glitter
Buck: Matte mid brown
Half Baked: Shimmery, intense gold
Smog: Shimmery deep bronze
Darkhorse: Darker brown colour with some gold flecks
Toasted: Dusty pink/rose wit some shimmer
Hustle: Cool taupe colour with some shimmer & hints of purple
Creep: Black base colour with gold sparkle
Gunmetal: Blue toned deep silver
 
 
Just thought I'd quickly mention a couple of my favourite shades: Virgin is my favourite highlight colour ever and the only shade here I've hit pan on. Half Baked is simply beautiful. Smog works great with my blue eyes. Sin makes a pretty, simple light everyday look.
 
Ok, onto the looks!
 
 
Look 1: Soft & Smudged


For this look after putting on a primer and NYX Jumbo Eye Pencil in milk on my very inner corner (I have a lot of darkness & veins around my eyes) I used the colour Sin on the inner half of my lid and Toasted on the outer half.
I lined my top lash line with the Urban Decay 247 liner in Zero and topped that with the shadow Creep.
I took a pencil brush and blended this out until it looked really soft and smudged.
I blended Virgin under the brow bone and inner corner and finally as a finishing touch I added a tiny bit of the colour Half Baked on the lower lash line, just near the inner corner for just a pop of gold :)
 
Look 2: Sultry & Smoked


For this one I wanted to make the look a little more smokey!
I primed my lids and added the NYX Jumbo Eye Pencil in Milk again to the inner corner.
I then used Sidecar on the inner half of the lid and then Creep to the outer half of the lid and then blended it to make it smokier.
This time when I did this, I blended out the Creep shade quite a lot but you could easily pack more onto the lid for a really intense look to make it darker!
I also smudged a bit of Sin just on the inner half but on the lower lashline.
I blended Virgin as my highlight on the inner corner and below the brow bone.
Then I used the UD 24/7 liner in Zero on the bottom water line and added mascara!
 
Look 3: Beautiful & Bronzed


*Sigh*
It is SO hard to get these colours to show up as vibrant on camera as they are in real life.
This is one of my favourite looks to do with this palette...Definitely one of my go-to looks!
I really love doing bronze/gold smokey eyes!
I primed my lids...added NYX pencil...etc. See above for details ;)
I used the colour Sin just on the very inner third but then used Half Baked for most of the middle third of the lid, blending into the Sin shade.
I then packed the colour Smog on the outer half of the lid....I think this colour works really well with the blue in my eyes!
I then added a small amount of Darkhorse to the crease and blended this out.
I once again used Virgin as a highlight.
I lined my bottom lash line with the 24/7 liner in Zero and then also decided to add some winged liner for something a little different. I used the Soap & Glory Super Cat liquid liner and then finished with mascara!
 
 
Look 4: Dark & Dramatic


For this look I wanted to create something quite dramatic!
After priming etc I first applied Gunmetal all over the lid and then used the 24/7 liner in zero to create the shape around the outer v, sort of like a cat eye shape. I then filled this in with the liner and then topped it with the Creep shadow.
I blended out the crease a lot to make it smoked and then used the colour Sin on the very inner corner and on the inner corner of the lower lash line.
I lined my waterline with the 24/7 liner and used Virgin as a highlight.
And then I finished with mascara!
I think it's really useful how even though most of the colours in the palette are neutral you can still create something really dramatic and smokey!
 
Look 5: Simple & Safe


I decided to include this look because it just emphasises what this palette is great at, just producing really simple and safe looks that still look pretty.
For this look after priming I used Sin all over the lid, but in all honesty you could use most of the shades in the palette all over the lid. Some of my favourites for a one shadow look are Sin, Sidecar, Virgin, Toasted and Hustle.
I then just used Virgin as a highlight and added mascara!
I think this palette makes doing these looks so easy and this look is great for when you only have about 5 minutes to do your makeup! :)
 
 
Wow. That's a long post!
I realise that there are 2 shades that I neglect in this palette, Naked and Buck. I think this is just because they are not shades that I would normally use. They are matte for a start (I'm such a sucker for shimmery shadows) and also being very fair skinned they are too dark for me to use as a blending colour. Because of this, they don't get used a lot and so weren't really used much in my looks here either. However every single other shade of this palette I DO get good use out of! :)


I hope some people found this useful, it definitely took a while together but I do think that this is a versatile palette and because I've gotten so much use out of it I think it's worth the price.
I think generally it's one of those palettes that I reach for when I'm being lazy because you can just pick out a random combination of shadows and it will pretty much always turn into a pretty look.
One that I just remembered that I love doing is having Smog all over the lid and Creep in the crease, these two blend so beautifully together!
 
So even though the shadows are all neutral (ish) you can still create quite a lot of different looks!
 
Thanks for reading!
Libby x
 

Saturday, 13 July 2013

Cruelty Free Makeup (+ List Of Brands!)

Hi!
 
Today I wanted to make a post on something that is slightly different...
 
All my life I've been an animal person and we've always had lots of pets. Because I am very concerned about animal welfare I recently did some research into makeup brands and animal testing.
I was quite shocked to see so many of the big name brands that still smear their cosmetics over animals unnecessarily.
 
(Just a little picture of the guinea pigs I had as a kid...
I think this photo itself shows two good reasons not to test on animals.)
 
 
Personally, no company that poisons, blinds and kills animals is going to get my support, or my money for their products.
 
According to PETA (People for the Ethical Treatment of Animals) there are more than 1100 companies that have agreed to ban animal tests forever - and with good reason. There are far better alternatives that are cheaper, faster and obviously more ethical. Now thanks to science, artificial substances can be created that can mimic living cells, so surely poisoning a rabbit with chemicals is no longer necessary?
 
Unfortunately some major brands still beg to differ.
I read a rather disturbing article the other day about how Revlon (despite claiming to be cruelty free for years) are now selling products to countries that require animal tests by law, meaning that countless more animals will suffer.
I personally won't go near another Revlon stand until this changes.
If you're interested, you can read the full article from PETA here:
 
Anyway...onto a happier note :)
 
There are many companies that HAVE decided to stop testing on animals and instead use alternative methods. I think they deserve a mention here!
Here is a quick list of just a few of the brands that are cruelty free...these are only a few of the brands and ones that I use or I know a lot of people use.
 
  • E.L.F Cosmetics
  • Makeup Geek Cosmetics
  • GOSH
  • Lime Crime
  • NYX
  • OCC (Obsessive Compulsive Cosmetics)
  • Barry M Makeup
  • Physicians Formula
  • Smashbox
  • Stila
  • Sugarpill Cosmetics
  • Tarte
  • Too Faced Cosmetics
  • Urban Decay
  • Rimmel *
  • Wet N Wild
  • MUA Cosmetics *
  • Accessorize Cosmetics*
  • Sleek Makeup*
  • Boots 17*
  • Boots No.7 *
Obviously these are just a few brands...I have a huge list written down to remind me which brands I can buy without feeling guilty!
I'd thoroughly recommend checking out this link:
Here not only can you access a full list of brands that DONT test on animals, you can find a list of brands that DO so you know what to steer clear from.
I'm disappointed to find out that both Maybelline and L'Oreal test on animals too...I will use up any remaining products I have from them but I refuse to buy anymore and I always completely ignore their stands when I'm shopping.
 
The brands with an asterisk are either ones that I contacted personally to find out if they tested on animals or ones that claimed on the website they were cruelty free.  They weren't on either PETA list. The ones I emailed responded saying that they did NOT test on animals, but the reason for them not being on the PETA lists is unclear.
 
Anyway...enough rambling ;) I hope those who read this will be inspired to be wary of which brands their buying from and I hope you will also check out those lists to learn more about which brands are cruelty free!
 
Happy guilt-free makeup shopping!
Thanks for reading :)
Libby x


*EDIT*
I recently found this website and thought that it would be useful to post here seeing as it offers cruelty free brands all in one place and all available to the UK! Here it's tricky to get some of these brands so I thought I'd put a link to help any other people here in the UK get cruelty free brands too!

http://www.cocktailcosmetics.co.uk/
 

Friday, 21 June 2013

How To Create A Smokey Eye Of Any Colour!

Hi!

I've always found that your basic smokey eye looks great on everyone - no matter your eye colour, hair colour or skin tone.
I decided to just compile a few of my favourite tips for creating a smokey eye and some products as its something that I know a lot of people find daunting! :)

Basic Technique:
 
With a good smokey eye its all about having a gradient. You want a mid toned colour, a dark colour and a lighter colour and if blended correctly, these will combine to create an amazing, smouldering smokey eye!
 
The most common colour for this type of eye look is black, combined usually with a silver/charcoal colour and a light colour for a highlight.
 
Basically....you want the darkest colour closer to your lash line, the middle colour all over your lid, and then the lightest colour as a highlight under the brow bone and on the inner corner, near the tear duct. You can also add the darkest colour into the crease and the "outer v" for extra smokiness and definition. Smokey eyes also go great with some smudged liner on the bottom lash line and waterlines and a good couple of coats of mascara!

 
Here is a picture to illustrate where you want the shadows...basically the darkest red naturally is representing the darkest colour in your smokey eye, the red the middle colour and the orange is the lightest colour.
 
Products:


This Bourjois Eye Shadow Trio in 01 is really great for creating your classic black smokey eye...
 
 
I created this simple smokey eye using the Bourjois shadows - this trio is so useful and I remember using this way back when I was just getting into makeup!
 
 
These are some swatches of the Bourjois trio.
 
 
If you want more intense colours, you can layer them over a base. These NYX Jumbo Eye Pencils are great for that, and these shades are perfect for a black smokey eye. The black shade is Black Bean, the silver (acting as the middle shade) is Pots & Pans and then the white is the lightest colour and is called Milk.
I've done a review of these HERE if you want to have a read & a closer look.
 
 
Here are swatches of the NYX Jumbo Eye Pencils! :)
I've found the best way to apply these is using a small synthetic brush and then smudging them out with your finger.  They will crease if you put on too much so be careful, but they will intensify your shadows.
Another option is the E.L.F Cream Eye Shadow Duos...
 
I have them in Black Liquorice and Coffee & Cream and they are also good for creating different looks.
Now for some different coloured smokey eyes besides your typical black smokey eye...
 
1) Brown Smokey Eye
 
This looks great on everyone. It's less intense than a black smokey eye but works well for work or for more everyday purposes.
You can use mattes if you prefer, but I personally love combining bronzes and golds to create a brown smokey eye.
 
For these types of looks, I love using the famous Urban Decay Naked Palette. It's simply beautiful and you can create a load of different looks.
 
 
I won't lie I have no idea why this is upside down. I tried to rotate it but it didn't work...anyway I'm sure you get the gist!
 
 
For the purposes of a brown smokey eye I'd recommend using the colours Sin, Smog and Darkhorse but of course there are endless options!
 
2) Deep Red/Pink Smokey Eye
 
I thought i'd show you something that was a little different to the usual types of smokey eye.
For a great deep pink or red smokey eye I love using the Too Faced "The Man Eater" palette.
Mine is quite old and I only use the shadows in this palette but they are great!
 
I haven't found names for these shadows but they are soft, pigmented and look beautiful.
You can really smoke out that deep wine red shade and make it as dramatic as you want.
This makes a really different alternative for a smokey eye.
 
 
3) Green Smokey Eye???
 
I thought I'd throw in something completely random here.
I recently tried out a green coloured smokey eye that I loved!
 
This is the Urban Decay Book Of Shadows 3 that came out a couple of years ago. I think you may still find this circulating around the internet and also some of the shades are in other palettes too so you don't need this identical palette for a green smokey eye.


These are the colours (from top) Loaded, Kush and Money.
These shades are amazing and look really good smoked together.
 
4)....Any other colour you can think of! :)
 
A great way to create a load of different looks is to get a huge palette full of different colours. From this, you can create any coloured smokey eye you want!
 
This is the 120 Pro Palette which you can easily find on Amazon or Ebay...They are sold under different brand names but they are all the same palette - the company just put their logo on the same products.
 
 
This is the Coastal Scents 88 Original Palette which is also really great.
 
Basically as long as you can get a light, medium and dark shade and apply them in the way I mentioned earlier you can create a smokey eye using any colours you want. You can make it as dramatic as you want or not! :)
 
 
I hope this post has been useful...sorry it's so long!
Thank you very much for reading if you managed to get to the bottom of this! I hope I've been able to show you some products that are useful and also how to apply them.
 Libby x